No products in the cart.
tips
How to Change Windows 11 Product Key
This tutorial will show you how to change the product key in Windows 11.
A Windows product key is a 25-character code used to activate Windows. It looks like this:
- PRODUCT KEY: XXXXX-XXXXX-XXXXX-XXXXX-XXXXX
Depending on how you got your copy of Windows 10 or Windows 11, you’ll need either a 25-character product key or a digital license to activate it. A digital license (called a digital entitlement in Windows 10, Version 1511) is a method of activation in Windows 10 and Windows 11 that doesn’t require you to enter a product key. Without one of these, you won’t be able to activate your device.
Sometimes you may need to change the product key in Windows 11 if you used a generic key, skipped entering product key during a clean install, or want to upgrade your Windows 11 edition with a product key.
Change Product Key in Settings
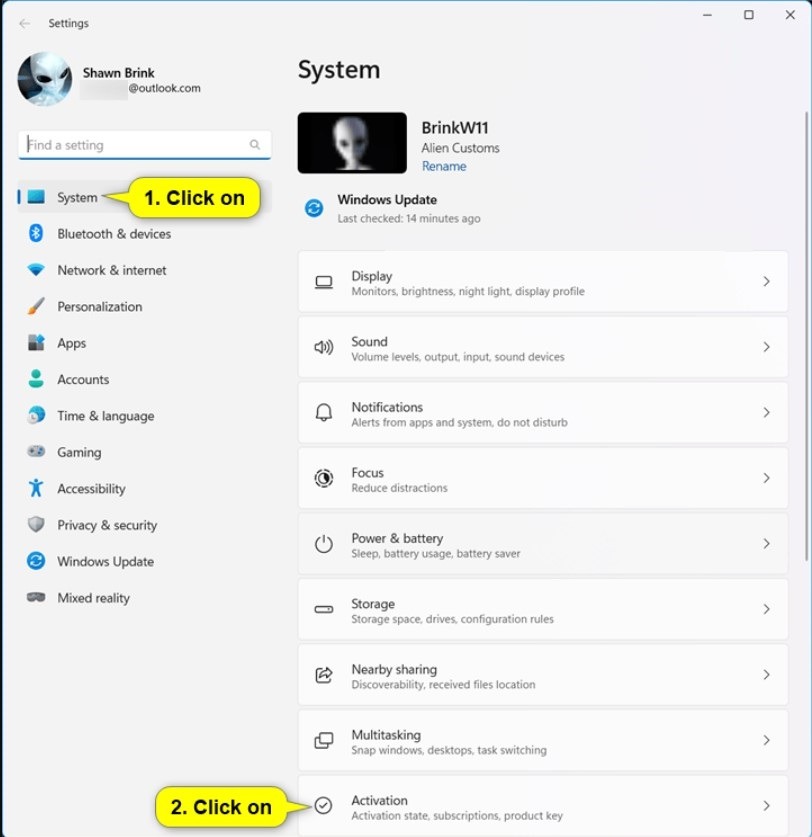
1, Open Settings (Win+I).
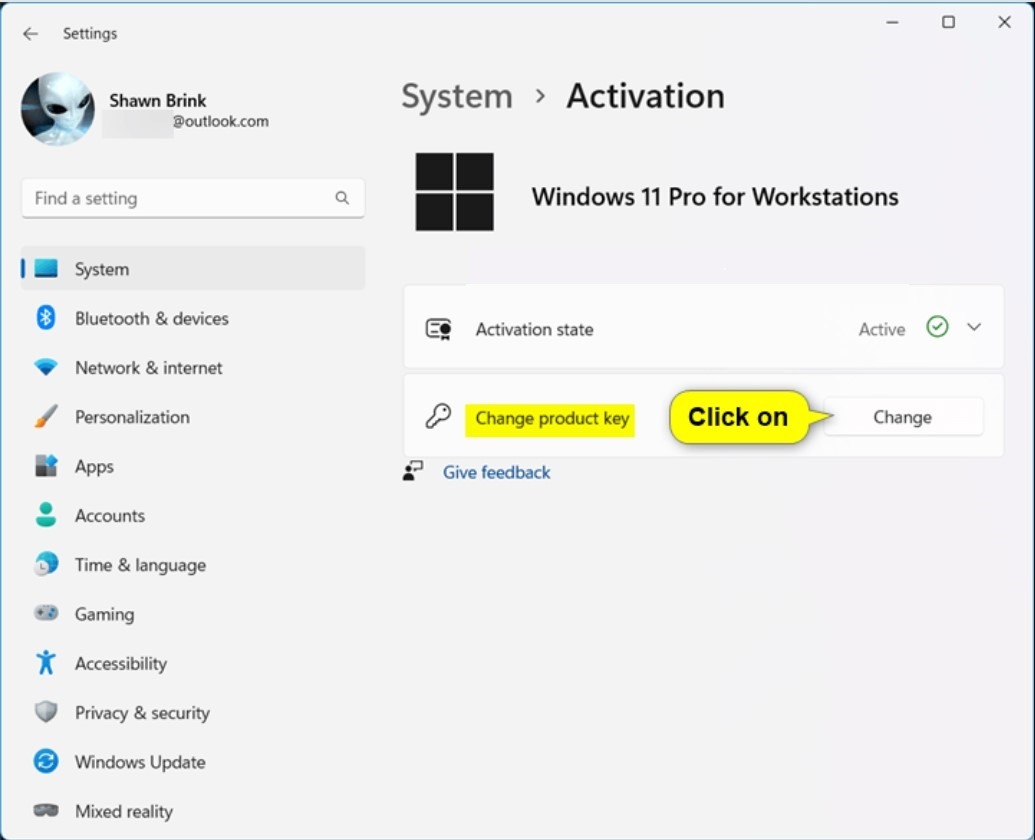
2, Click/tap on System on the left side, and click/tap on Activation on the right side. (see screenshot below)
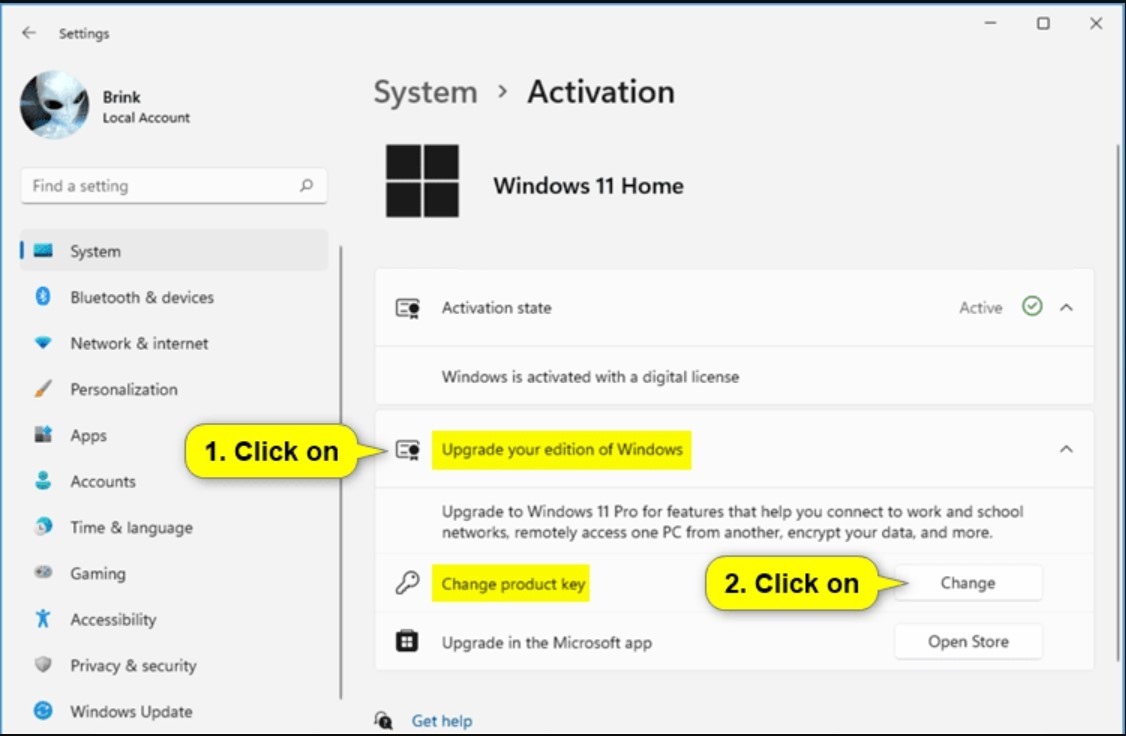
3, Perform one of the following actions depending on which Windows 11 edition you have installed: (see screenshots below)
- If you have a Windows 11 Home edition, click/tap on Upgrade your edition of Windows to expand it open, and click/tap on the Change button to Change product key.
- If you have a Windows 11 Pro edition, click/tap on the Change button to Change product key.
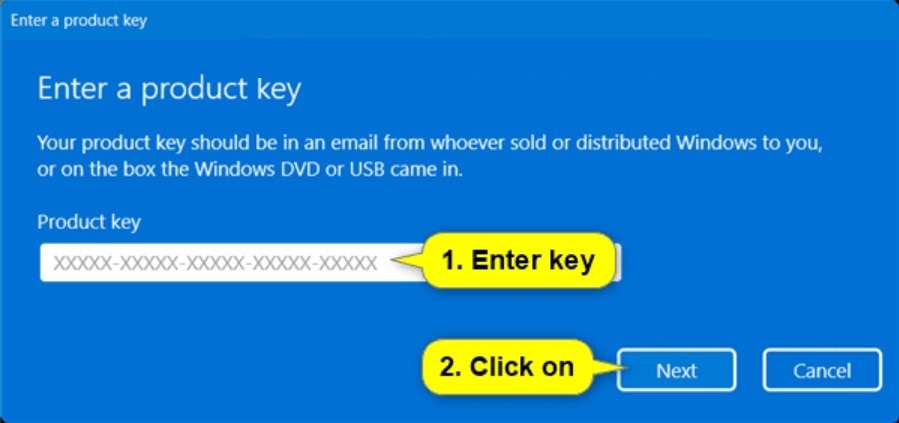
4, Enter your 25-character product key for Windows 11, and click/tap on Next. (see screenshot below)
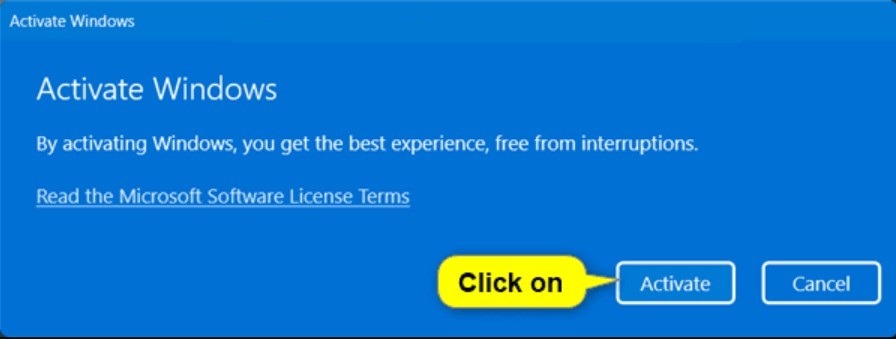
5, Click/tap on Activate. (see screenshot below)
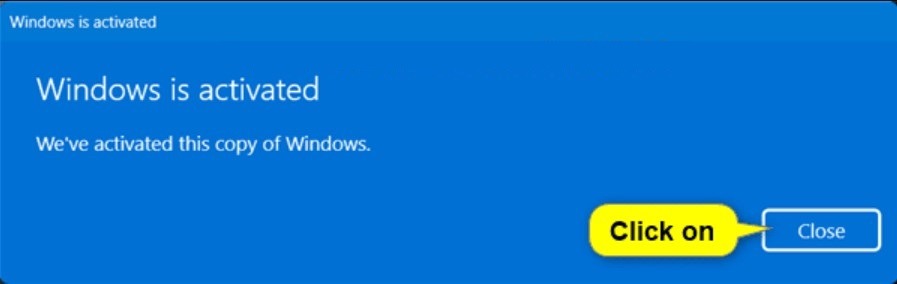
6, Click/tap on Close. (see screenshot below)
Option Two
Change Product Key using Command
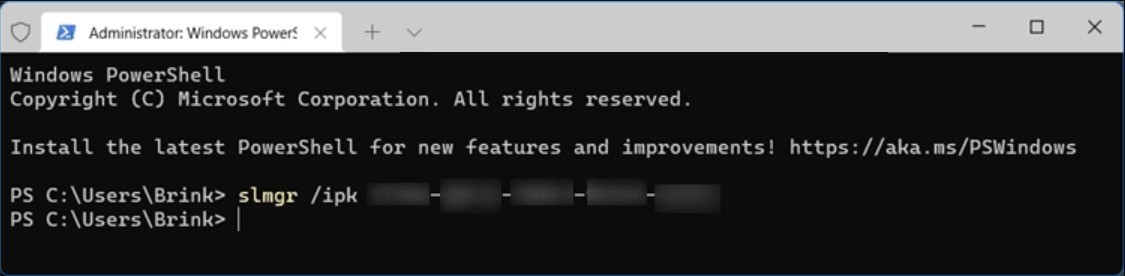
1 Open Windows Terminal (Admin), and select either Windows PowerShell or Command Prompt.
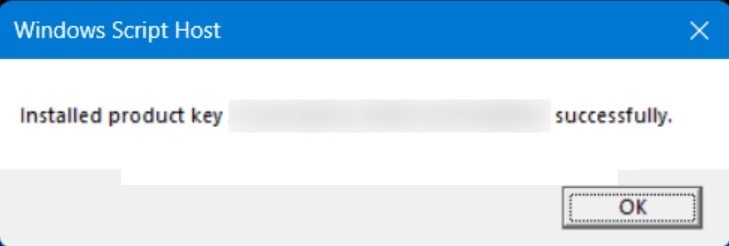
2 Type the command below into Windows Terminal (Admin), and press Enter. (see screenshot below)
slmgr /ipk product key
Substitute product key in the command above with your 25-character product key with dashes.
For example: slmgr /ipk XXXXX-XXXXX-XXXXX-XXXXX-XXXXX